
It’s common knowledge that getting dental implants is the best cosmetic option to replace missing teeth, but what is the dental implant surgery actually like? We’ve put together the overview and explanation of the dental implant procedure so patients know exactly what to expect.
Step-by-Step Procedure for Dental Implants
Proper installation of a dental implant is vital, so great care should be taken in the first part of the procedure. We start by accessing the patient’s jawbone through the gums and then drilling a pilot hole into the jawbone for the implant’s placement.
Before any of the actual dental implant work can be completed, the patient should be put under anesthesia. Anesthesia method will depend on the office, the availability of anesthesia types, and the preference of the patient. While local anesthetic is the most common choice, sedation is also an option, especially for patients who may find general dental work particularly difficult or intimidating.
There are two main types of dental implants: endosteal implants (held in by a titanium post) and subperiosteal implants (which use a metal framework). The following steps outline the more common endosteal implant process, though the process is very similar for subperiosteal implants.
Step One: Reaching the Jawbone for Evaluation
The first step in the dental implant procedure is preparing the jawbone. This can be done in one of two ways, depending on the initial evaluation of the patient’s mouth.
-
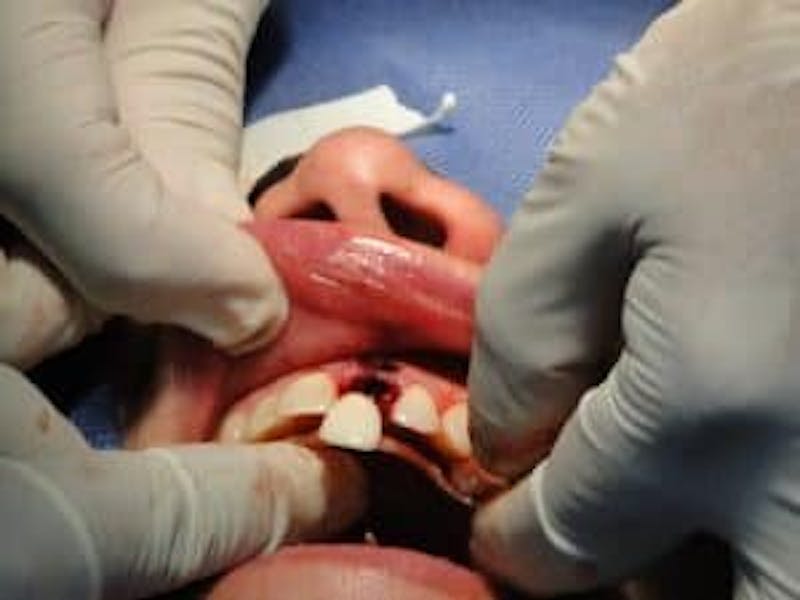
Method One: Peeling the Gum Tissue Back - This is the most common method for reaching the jawbone. In order to peel back the gum tissue, a scalpel is used to create an incision–then a dental elevator is used to peel the gum tissue back creating a flap. Once exposed, the jawbone is evaluated to ensure it’s a match for an implant. An ideal bone will be smooth and even. If it’s not, a drill can be used to reshape the bone to accept an implant.
Method Two: Circular Incision - Sometimes, a less invasive option is available via a small circular punch. During the procedure, a small, round section of the gum is removed. Because the small area of exposed bone is too small for evaluation, this can only be done when the dentist is experienced enough to ensure the bone is fit for an implant.
Step Two: Locating the Ideal Implant Site
With the bone exposed, it’s now time to use a bur to make a mark on the bone where the implant will be placed. This tiny indent commonly called a divot will be used to both mark the site and guide the larger pilot drill to come.
Step Three: The Pilot Hole
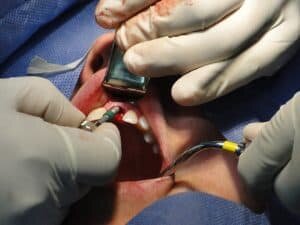
Next is the creation of a pilot hole. This is a small hole created using a small diameter drill called a pilot drill.
To ensure the pilot drill is exact, a pre-created jig (sort of like a mouth guard) is used.
The guard has a hole over the implant site so that the drill bit can easily find the correct spot.
Step Four: Checking the Current Work
With the use of an alignment pin, the oral surgeon will check their work to ensure the placement is straight up and down, centered, and properly aligned with the other implants and natural teeth.
Step Five: Finishing the Pilot Hole & Alignment Check
At this stage, initial adjustments have been made. The positioning is complete, so it’s time to finish the pilot site and run a final alignment check.
Slowly and carefully, not to overheat the bone, the pilot hole will be drilled to the full depth of the implant. Once drilled, the alignment pin will be reinserted to ensure the hole is still straight and centered. If placement is acceptable, the next stage of fitting the implant can begin.
Step Six: Drilling the Implant Hole
Using bits of increasing size, the dentist or oral surgeon will slowly drill into the bone to create a hole that will fit the implant’s anchor with most measuring around 4mm. The alignment pin will again be inserted to check the hole, and once any adjustments have been made, it's time for the next step.
Step Seven: Threading ad Inserting the Implant
It’s time to thread the bone. The smoothly drilled space now needs to be given the same ribbed appearance as a screw. To achieve this, a screw tap will be slowly drilled into the hole. If available, the dentist may also choose to use a self-tapping implant. Self-tapping implants create the ribbed pattern in the bone as they are inserted. This allows for a firm, fitted, secure implant.
When a self-threading implant isn’t available, the next step is to place the implant. Using either a drill or hand wrench, the implant is threaded into the bone.
Step Eight: Healing the Dental Implant Site
Before any further work can be done, the bone and implant need to heal. You want them to fuse to form a steady root for your new dental fixture–whether that be a crown or denture.
Once the implant has been placed, a healing cap is inserted on the top. Then the gums are gently set into place over the bone and around the cap. The gums will require trimming, so they rest comfortably around the implant. Once they’re situated, sutures can hold them in place.
Typically, sutures are left in place anywhere from a week to 10 days. Following this time period, a dentist will remove them and ensure the health of the site. An additional six months is needed for the bone to fuse with the new implant. Some dentists require that the implant is kept with the healing cap in place.
In other cases, depending on the stability of the implant, size of the area, and type of tooth, a temporary tooth can be placed on the healing cap. This can only be done if the dentist believes the use of the artificial tooth won’t affect healing or cause the implant any trauma.
Step Nine: Permanent Restoration Placement
So, you’ve gone through the drilling and implant placement. You’ve waited six months or more for healing. You’ve treated your implant site with care and kept it clean. You’re ready to get the final piece of the puzzle.
The healing cap is removed, and an abutment is placed. This is a nub, for lack of a better term, which will serve as the port where the dental prosthetic will be screwed in. The pre-created dental crown is then screwed onto the abutment, and the process is complete. It’s now up to the patient to properly care for and clean the crown each day.
It should be noted that implants can be made as bridges or dentures as well. Denture implants are special dentures that are secured into place via implant anchors. These can be placed and fixed in the mouth at this stage as well. If multiple implant sites are needed, the above dental implant procedure would be followed for each section–likely during one sitting, then allowed to heal as a group. Once recovered, the full denture or bridge can be placed.
Determining if the Dental Implant Procedure Is Right for You
If you have the need for artificial teeth but you want something more stable and natural than a denture, the implant procedure can be an excellent solution. The success rate is extremely high, and the results look and feel completely natural.
Wondering if now is the ideal time to get dental implants? All you have to do is speak with a skilled, experienced dentist. They can provide you with a complete consultation and help you to understand the costs, timeline, and procedure. You may be surprised to learn that implants are more within reach than you realized.